DIY: 1920’s flapper Warm Woven Headband

We’ve got a new DIY this week!  We know the weather is getting colder but that is no reason not to look fashionable this winter.  Check out this modern headband inspired by the “roaring 20’s.”

All you need for this project is some stretchy fabric, like knit jersey, and a pair of scissors.  This was made out of an old dress but you can use an old tee shirt or anything lying around.  Make sure there is enough fabric to fit around your head plus extra.

1. Begin by cutting 6 strips from the fabric. If there are seams in the material, don't worry about it. You can tuck seams in later but make sure they are sturdy enough not to come apart.

2. Next, tie the strips in a knot around a sturdy object like a chair.

3. Now here comes the weaving. To make it easier, I numbered each strip. Take strip 1 and go over strip 2.

4. Now weave strip 1 under strip 3.

5. Now weave strip 1 over strip 4.

6. Now weave strip 1 under strip 5.

7. Lastly, weave strip 1 over strip 6. This is what the pattern will begin to look like.

Just to reiterate, you will take strip 1 and go over and under to the last strip.  Make sure that you go over strip 6 and that they do not get mixed up.  It helps to keep the first 5 strips to the left and once you have finished with the first one, put it to the right.  Once you have finished, strip 2 will now become strip one and you will repeat the pattern.

8. Repeat this pattern until the piece is long enough to fit around your head. Cut off any excess fabric.

9. Now you can fold each end together. Split one end so there are three strips on each side and place the other end between them.

10. To finish it off, take a piece of excess fabric and wrap it around the middle. Tie in the back and tuck in. See above on how to wear.

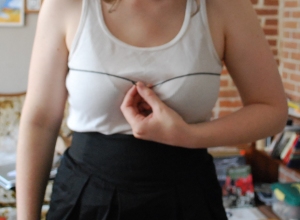
 

Scrappy Vintage: Make Your Own Hipster Tank From Leftover Fabric, DIY Style

AS A USED CLOTHING STORE, THE ATTIC IS ALWAYS SUPPORTIVE OF REUSING AND RECYCLING CLOTHING.  A WEEK AGO OUR EMPLOYEE, SHANNON, WROTE A BLOG POST ABOUT HOW TO SHORTEN A VINTAGE DRESS.  FOR THIS NEXT PROJECT, WE’RE GOING TO SHOW YOU WHAT YOU CAN DO WITH THE LEFTOVER FABRIC FROM THAT PROJECT (BUT YOU CAN REALLY USE ANY FABRIC YOU WOULD LIKE).

Things You Will Need:

Enough fabric to fit around your waist and not be too short (about ¼ yard)

Ruler

Measuring tape or string

Pins

Sewing machine or needle and thread

7 buttons, any size (this is optional)

*note: this is a basic square shirt with straps.  Sewing by hand or with a machine is involved to make the edges look nicer.  Folding hems over twice is not necessary; it just makes the garment sturdier and cleaner.

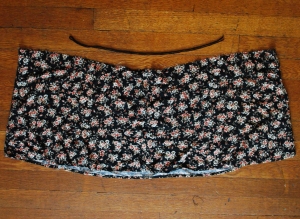
To begin, measure around your chest with a measuring tape, or if you don’t have one (like me), use a piece of string. Remember to measure just a little bit bigger than chest size because it gets smaller when you sew.

lay the fabric flat on the floor or a table. Since the fabric is folded in half, you only need half of the measurement. Fold the string or measuring tape in half.

Mark the fabric with a pin so you know where to cut. Repeat this about 4 more times down the shirt.

Now it’s time to cut! Remember to cut about a ½” from the pins so you have room to sew.

Now flip the two sides over so that the inside is facing out. Pin each side and sew them together.

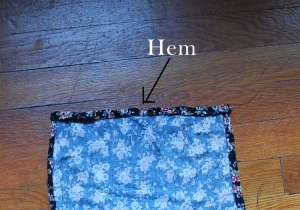
Now it’s time to hem the top of the shirt. With the inside of shirt facing out, fold the edge over twice and pin it. Flip the shirt over and repeat. Now you can sew the hem.

If you want to add buttons to the front, you can keep reading. Otherwise, skip to step 10. Measure the middle of the shirt and cut down the front layer (don't cut through the back!).

Now it’s time to hem the two front flaps. Fold the edge over twice, pin it, and sew it.

You can either make button holes or, like I did, just sew the buttons to the front. Place one hemmed front over the other and sew the buttons evenly apart (about 1½” apart)

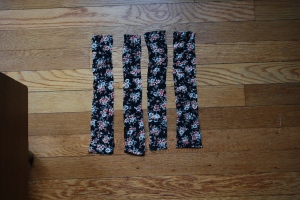
Now you can make the straps. Cut four strips from your fabric, about 1½”-2”.

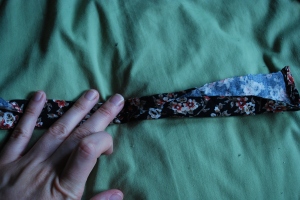
Hem the straps to make a clean edge. Start by folding one edge to the middle.

Now fold the other edge over it and…

Pin it. Sew them up the middle and sew them together. Cut off any excess.

Pin the straps to the shirt and sew them on. Cut off any excess.

And now you have a really cool, vintage-inspired, hipster shirt!